Image Carousel Challenge
Open the project folder
In our starter files, open the index.html page from this lessons folder:
11.More-practice > 02.Image-carousel
Introduction
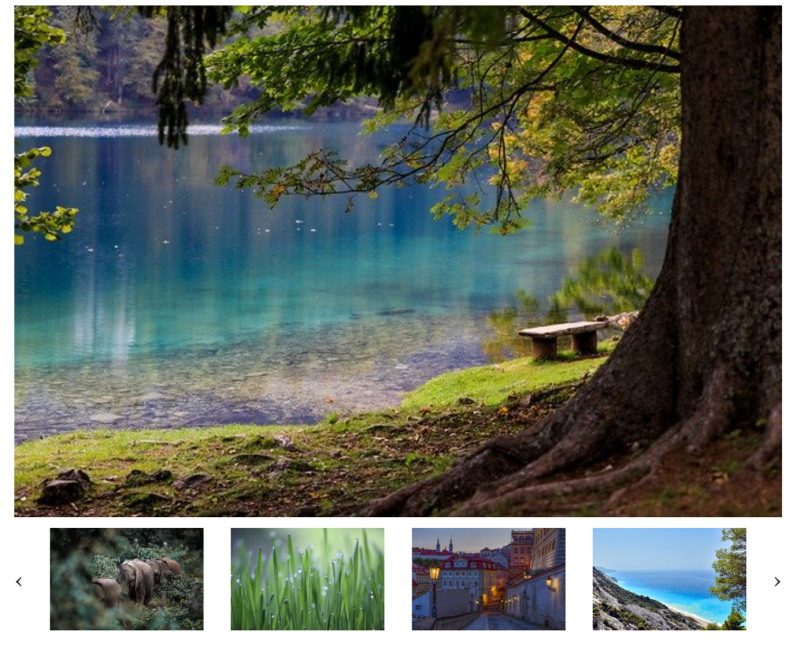
The next project is an image carousel built with JavaScript. It is a handy feature that many websites have, and you can re-use it in other projects.

Features include clicking on a thumbnail to replace the main image, and left/right arrows to cycle through the images. Both involve re-ordering the existing images.
You will find the following in the project folder:

The index.html has only an empty div for the carousel, the contents will be generated with JavaScript:
<div id="carousel"></div>
<script src="carousel/carousel.js"></script>
There is also a carousel folder grouping all the images, JavaScript, and styling for the carousel. This one is a little bit more of a challenge, but give it a try and you can always refer to the final code in the next lesson if you need to. Try to take each step as a mini project.
Project steps
You can go about making this any way you want to, or here are some steps to follow:
- Create an array of image file paths (eg. “carousel/images/xxx.jpg”).
- Create a function called
setImages(). Inside this function, recreate the following structure using JavaScript:
<div id="carousel">
  <img src="carousel/images/town.jpg" class="large carousel">
  <div id="smallImageWrapper">
    <img src="carousel/images/elephants.jpg" class="small carousel">
    <img src="carousel/images/lake.jpg" class="small carousel">
    <img src="carousel/images/beach.jpg" class="small carousel">
    <img src="carousel/images/grass.jpg" class="small carousel">
  </div>
</div>
📝 Hint: You can loop over the images array. To set the large image, first check is the
#carouselwrapper is empty. If it is, create the image with the classes oflargeandcarousel. Else, add the classes ofsmallandcarousel.
- Create a function called
setArrows(). This will be used to create the left and right arrows to cycle between the images. - Use
setArrows()to create<span>elements to display the arrows (HTML entity codes are ‹ for the left arrow, and › for the right arrow if you wish to use). Add these to the beginning, and the end of the smallImageWrapper section. Your generated HTML should now look like this:
<div id="carousel">
  <img src="carousel/images/town.jpg" class="large carousel">
  <div id="smallImageWrapper">
    <span id="left">‹</span>
    <img src="carousel/images/elephants.jpg" class="small carousel">
    <img src="carousel/images/lake.jpg" class="small carousel">
    <img src="carousel/images/beach.jpg" class="small carousel">
    <img src="carousel/images/grass.jpg" class="small carousel">
    <span id="right">›</span>
  </div>
</div>
- When creating the arrows, add the id of left to the left arrow, and right to the right arrow. This can be used soon to check which arrow was clicked.
- Add a click event listener to each arrow, calling a function called reOrder.
- Create the reOrder() function. Use this function to loop over the existing images and check if the left or right arrow was clicked (hint: the id can help).
- You will now need to create a new array with the images re-arranged, depending on if the left or right arrow was clicked.
📝 Hint: To re-arrange the array, work with the image index positions, and construct a new array. Make use of array methods such as shift() and pop() to cycle the positions around.
- Create a function called
swapImages(). - Call
swapImages()when a small image has been clicked on. - Inside of
swapImages(), the small image which was clicked on should be set to be the large image (hint: move this to be the first array item, this will then receive the.largeclass).
Give this a try, if you get stuck or want to compare to a finished solution, this is available in the next lesson. Good luck!